What Is the WP Engine Workflow?
This is our way of deeply troubleshooting a site without impacting a customer’s live site.
Many support teams will disable plugins, etc. directly on a customer’s site — however, this can cause any number of unintended and damaging consequences. To avoid this, we ask customers for permission to copy their site into a private installation with a hosting company named WP Engine.
Using the WP Engine copy, we can make any changes we need to without impacting the customer’s live site in any way.
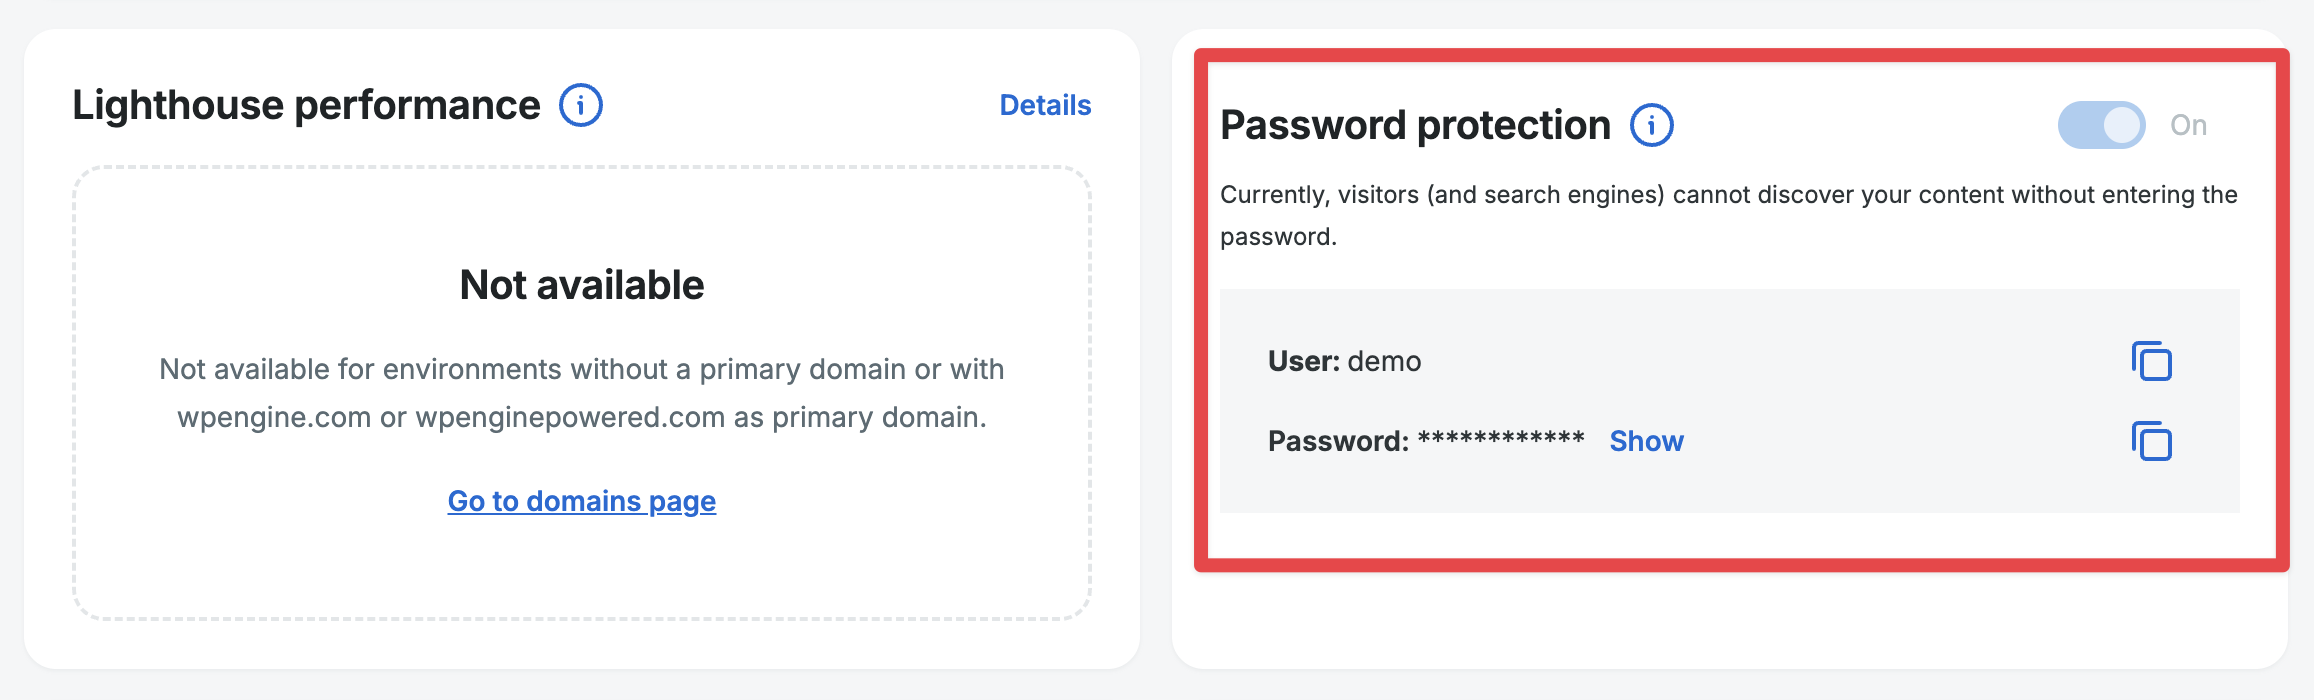
Important: The URLs and all credentials to WP Engine sites should never be shared with customers. This is to protect the privacy of all customers since the information could be used to view and/or access the sites that are copied to that environment in the future.
When to Use This Workflow
In some cases, the WP Engine workflow will not make the most sense. For example, if you know that the issue the customer is seeing is caused by server issues (common with SMTP), then copying the site to a new server will in many cases not be helpful.
Here are some general guidelines to help you decide whether the WP Engine workflow could be the best option:
- You suspect a code conflict (so need to disable plugins, change theme, etc.)
- You aren’t sure if the issue is related to server settings, and want to try putting it on a different server
- You need to do any potentially invasive testing or debugging
- The issue is not related to an API (reCAPTCHA, etc.)
This migration workflow is not supported for some types of sites:
- Sites hosted on WordPress.com
- Multisite
- Sites protected with .htaccess credentials
Note: Before using this workflow, always check that both WordPress core and WP Simple Pay are fully up-to-date on the customer’s site. If they aren’t updated, ask the customer if it’s ok for you to run those updates for them.
WP Engine Workflow Procedures
Debug sites are all numbered and assigned to specific teams. Our two sites are:
- wpsimplepay001
- wpsimplepay002
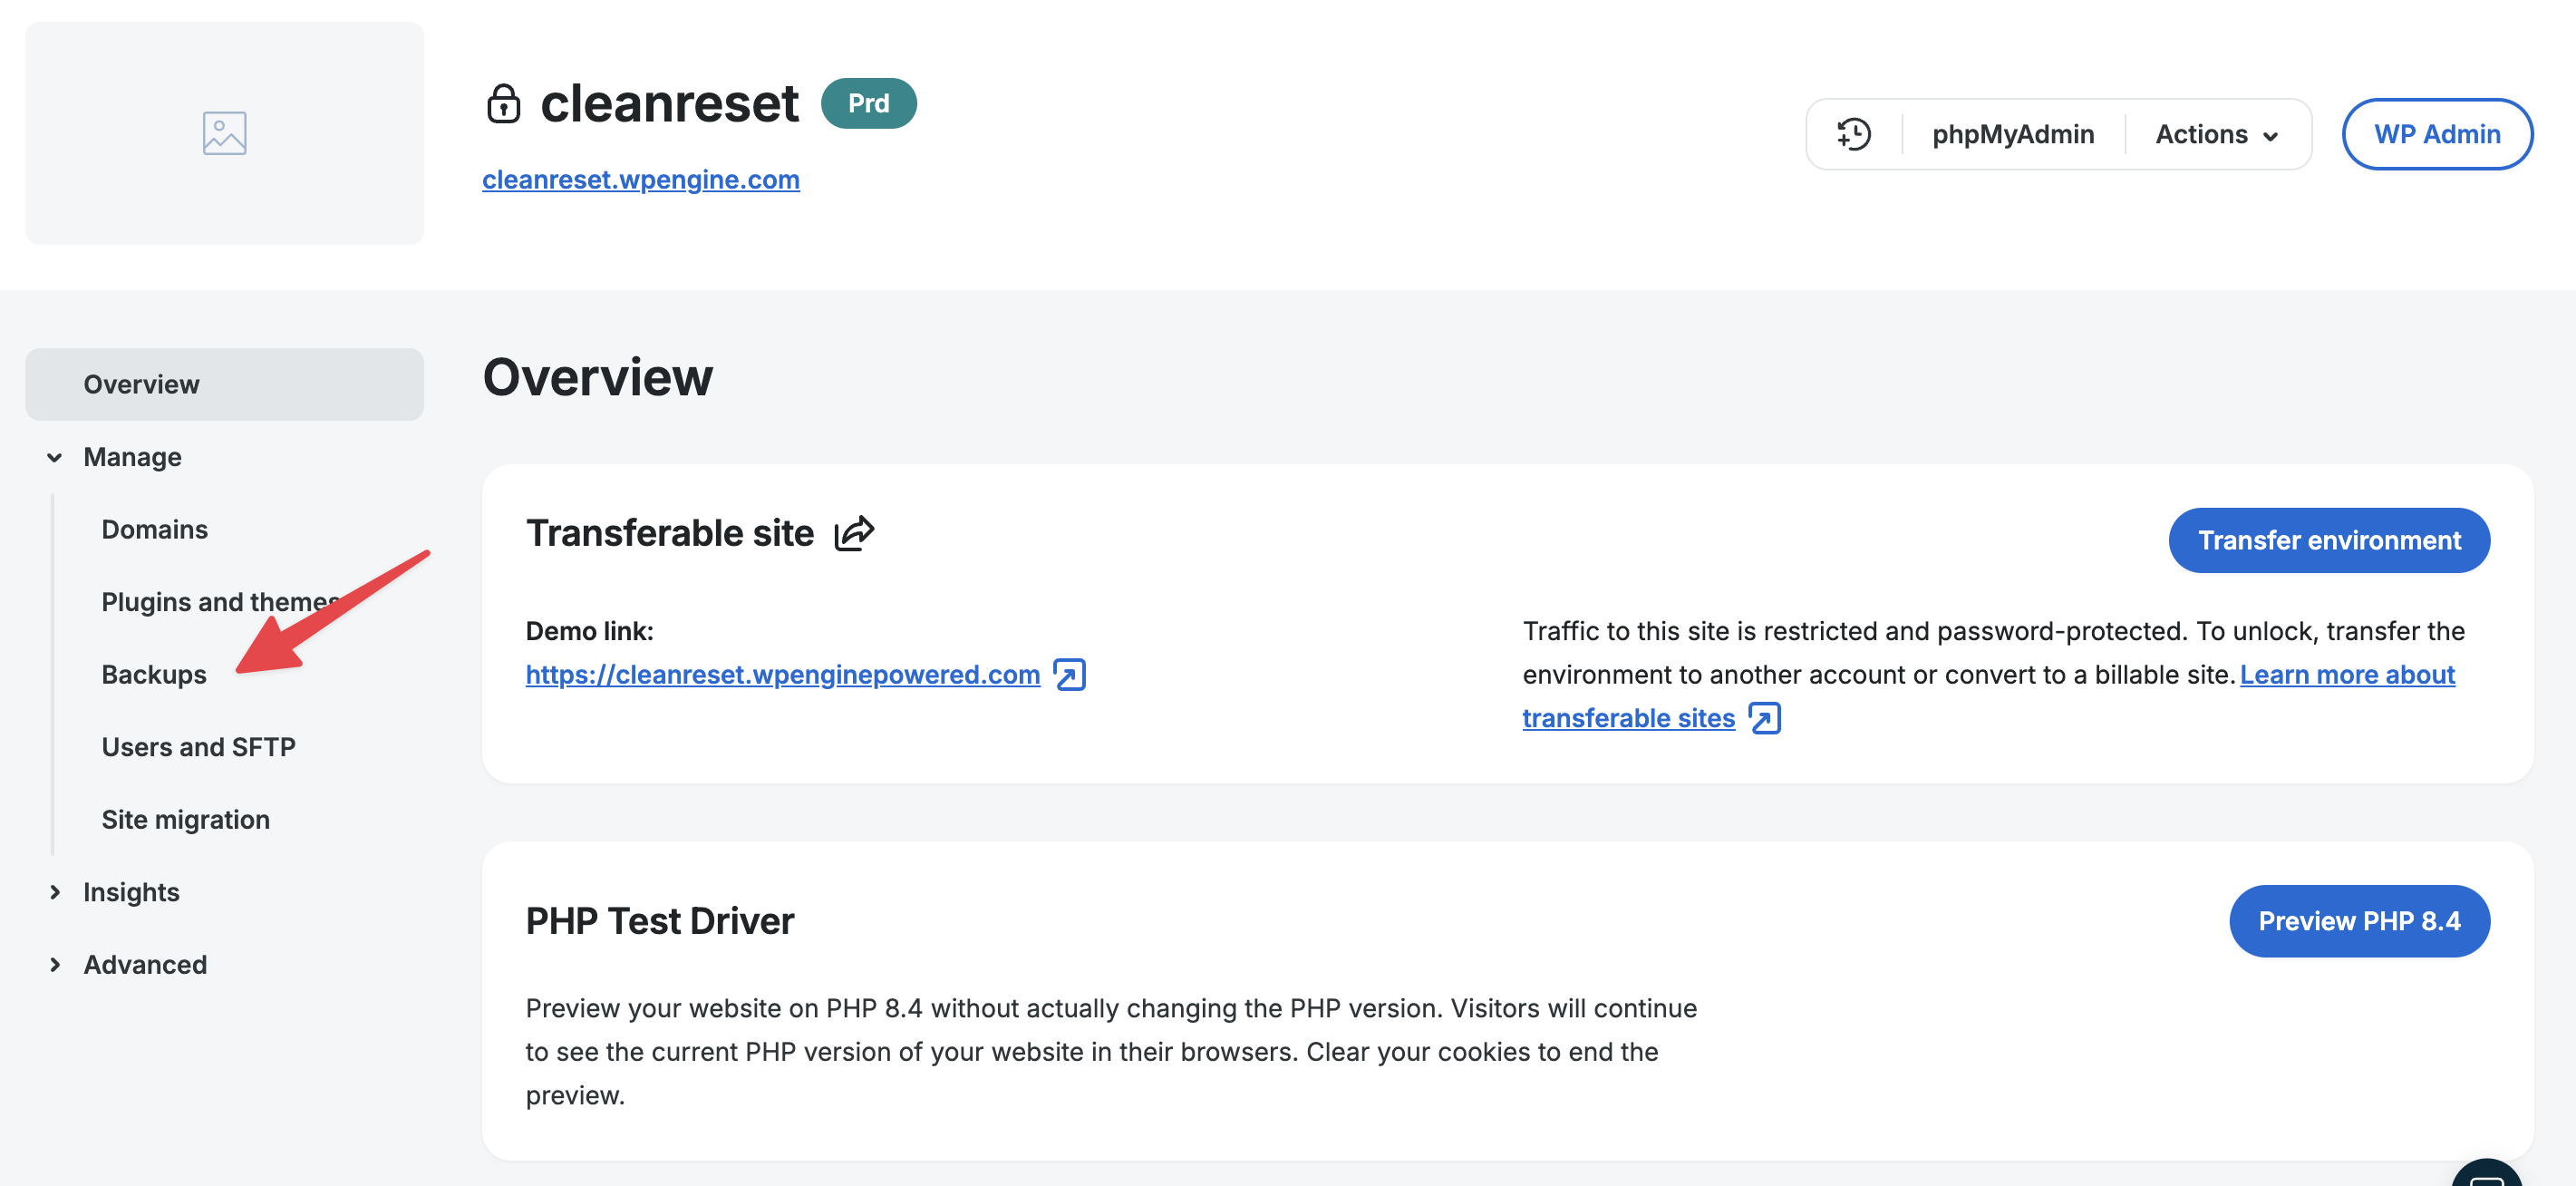
Clear/Reset Install
Always do this before bringing in a new site. It helps to ensure that the site is fully cleared (avoid getting odd residuals from a previous site).
- Go to https://my.wpengine.com/sites.
- Click on the site named Clean Install for Resets Only.

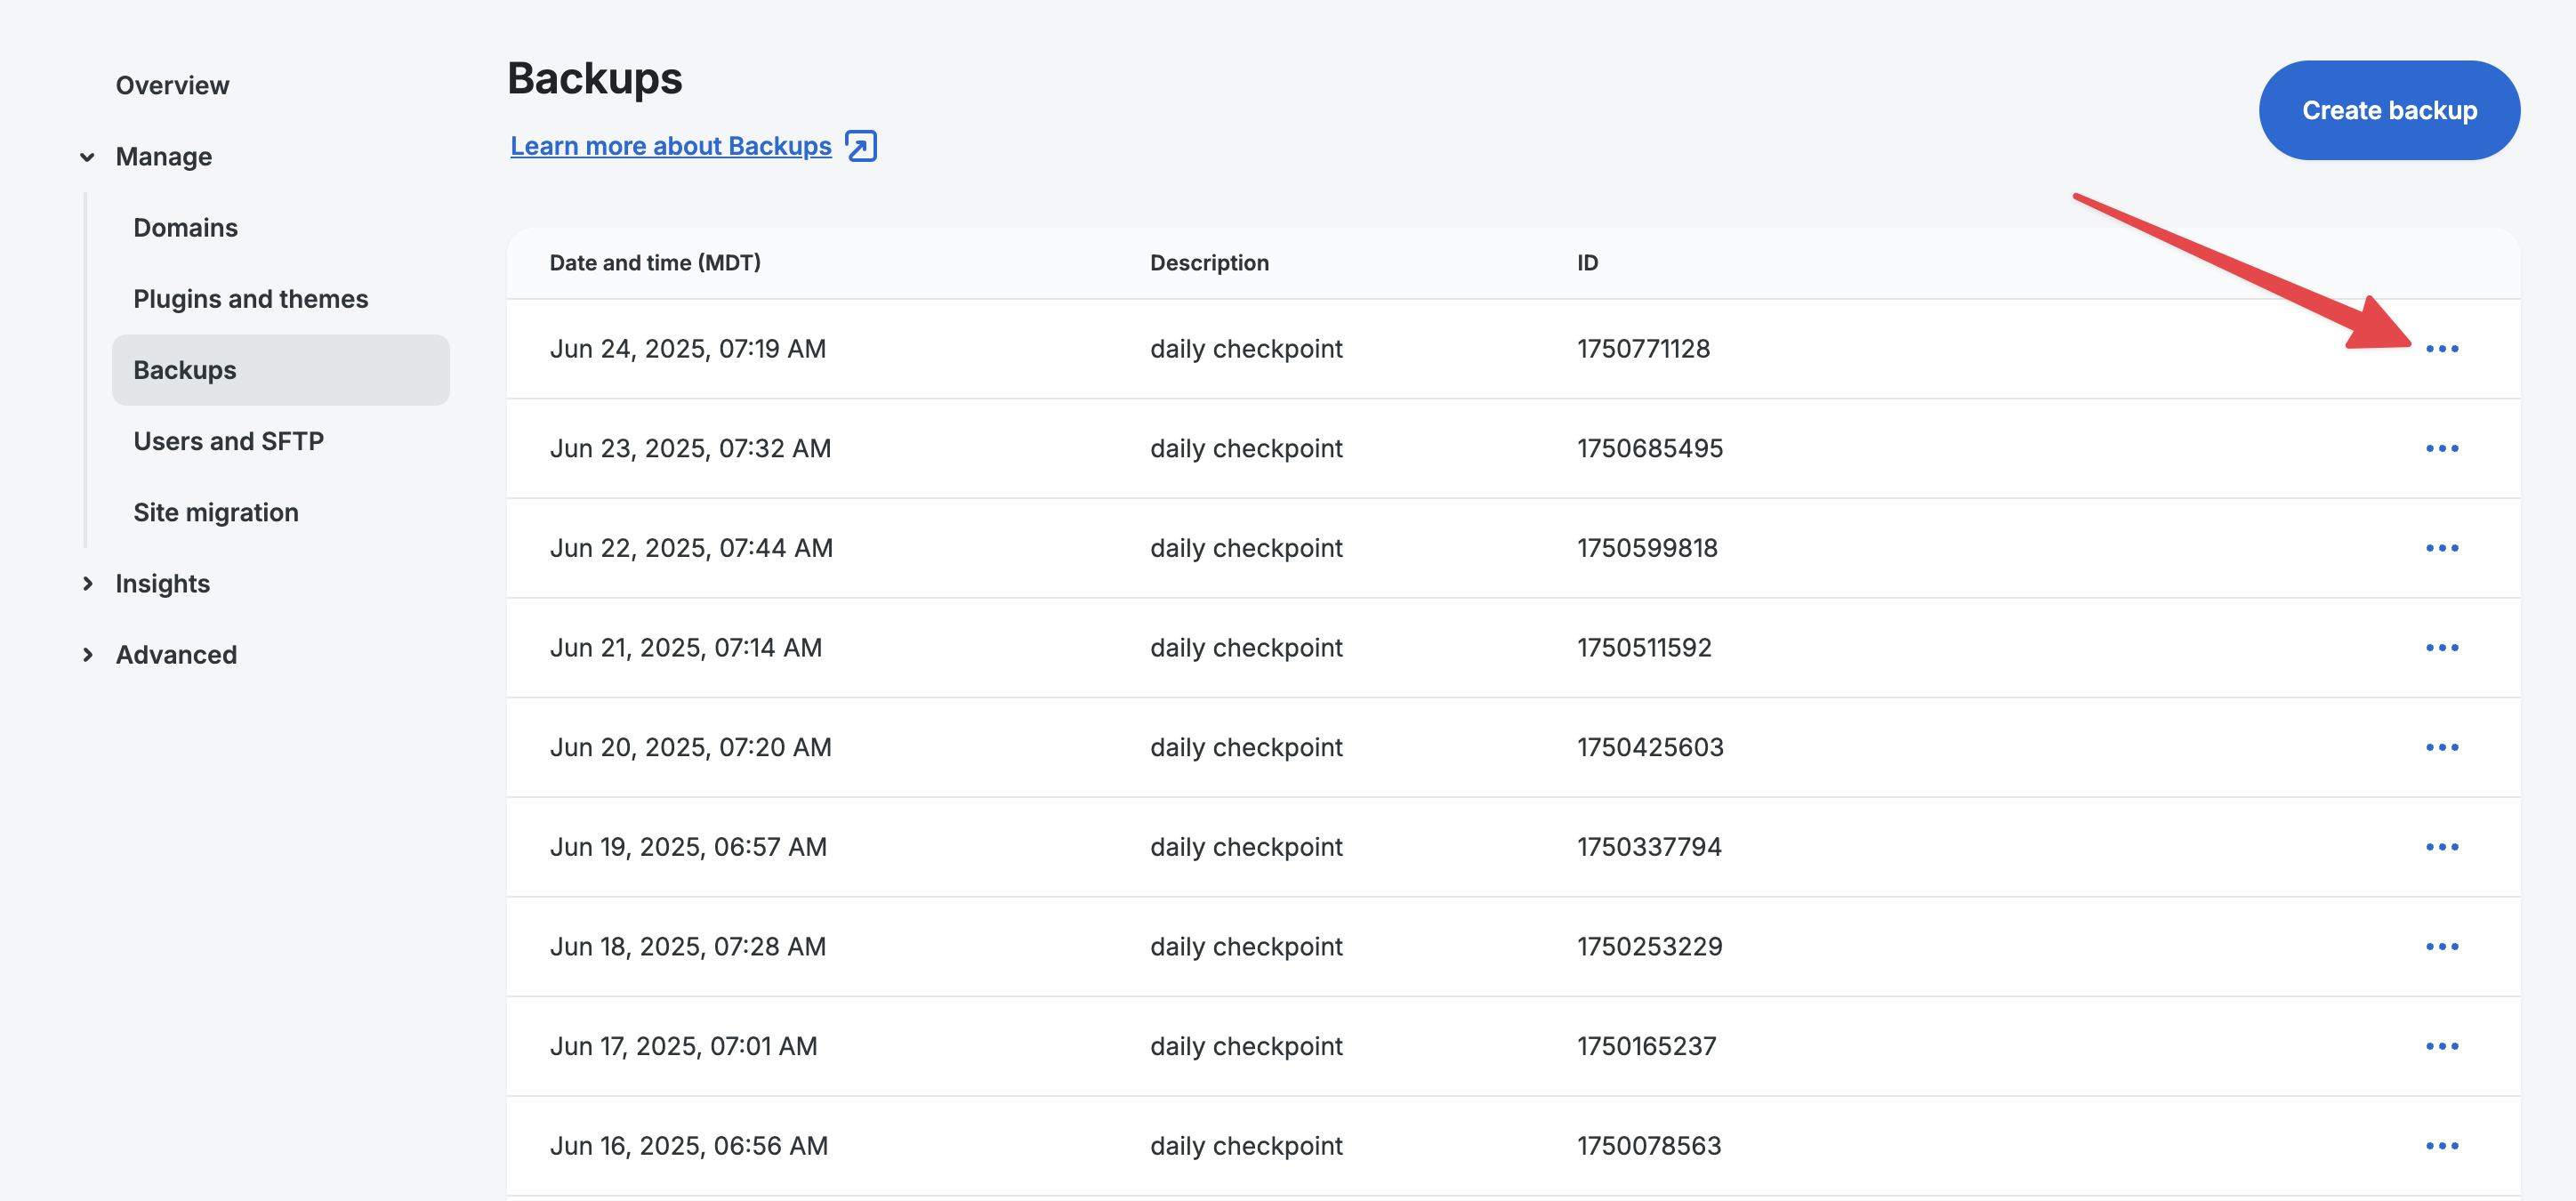
- In the left sidebar, click on Backups.
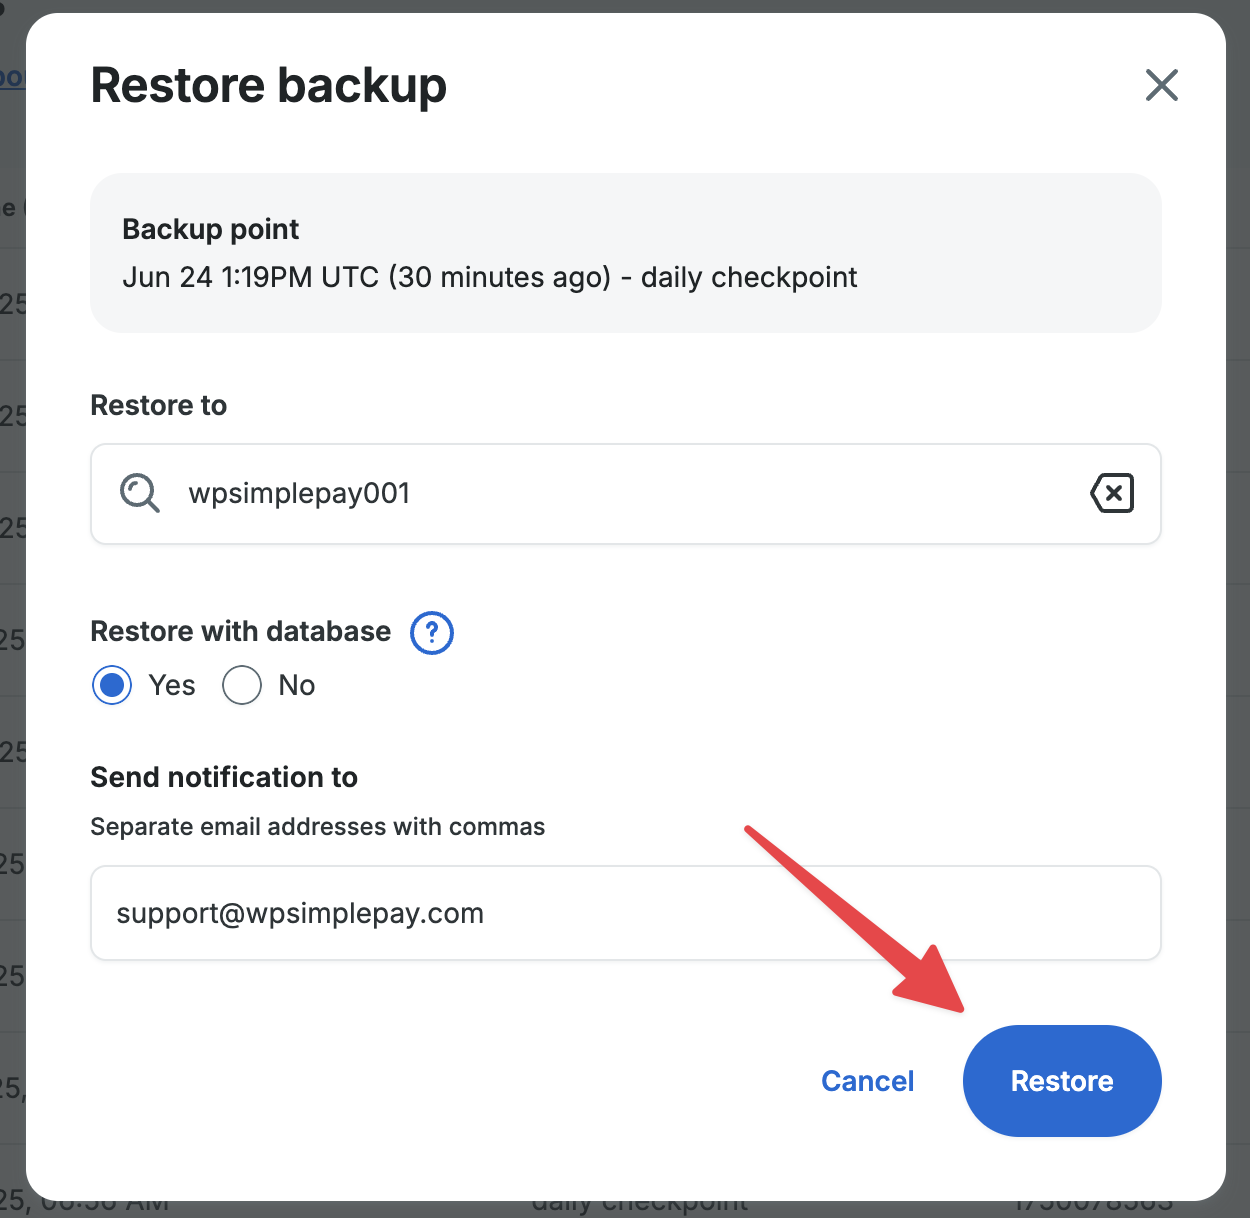
- Select the latest backup point, click the three dots to the right, and choose Restore in the pop-up.
- Fill out form:
- Restore to: [Select your installation; wpsimplepay001 or wpsimplepay002]
- Restore with database: Yes
- Send notification to: [email protected]
What happens next?
At the top of the screen, you should see a green note appear.

As mentioned, an email will be sent to our Help Scout inbox when this process is complete. In most cases, it should only take 5-10 minutes, but it may take longer.
Copy a New Site into WP Engine
Note: Before proceeding, you should already have the customer’s WordPress admin username and password.
- Open https://my.wpengine.com/sites and click on one of your assigned installs, wpsimplepay001 or wpsimplepay002.
- Click on the site’s URL to check that it’s been reset.
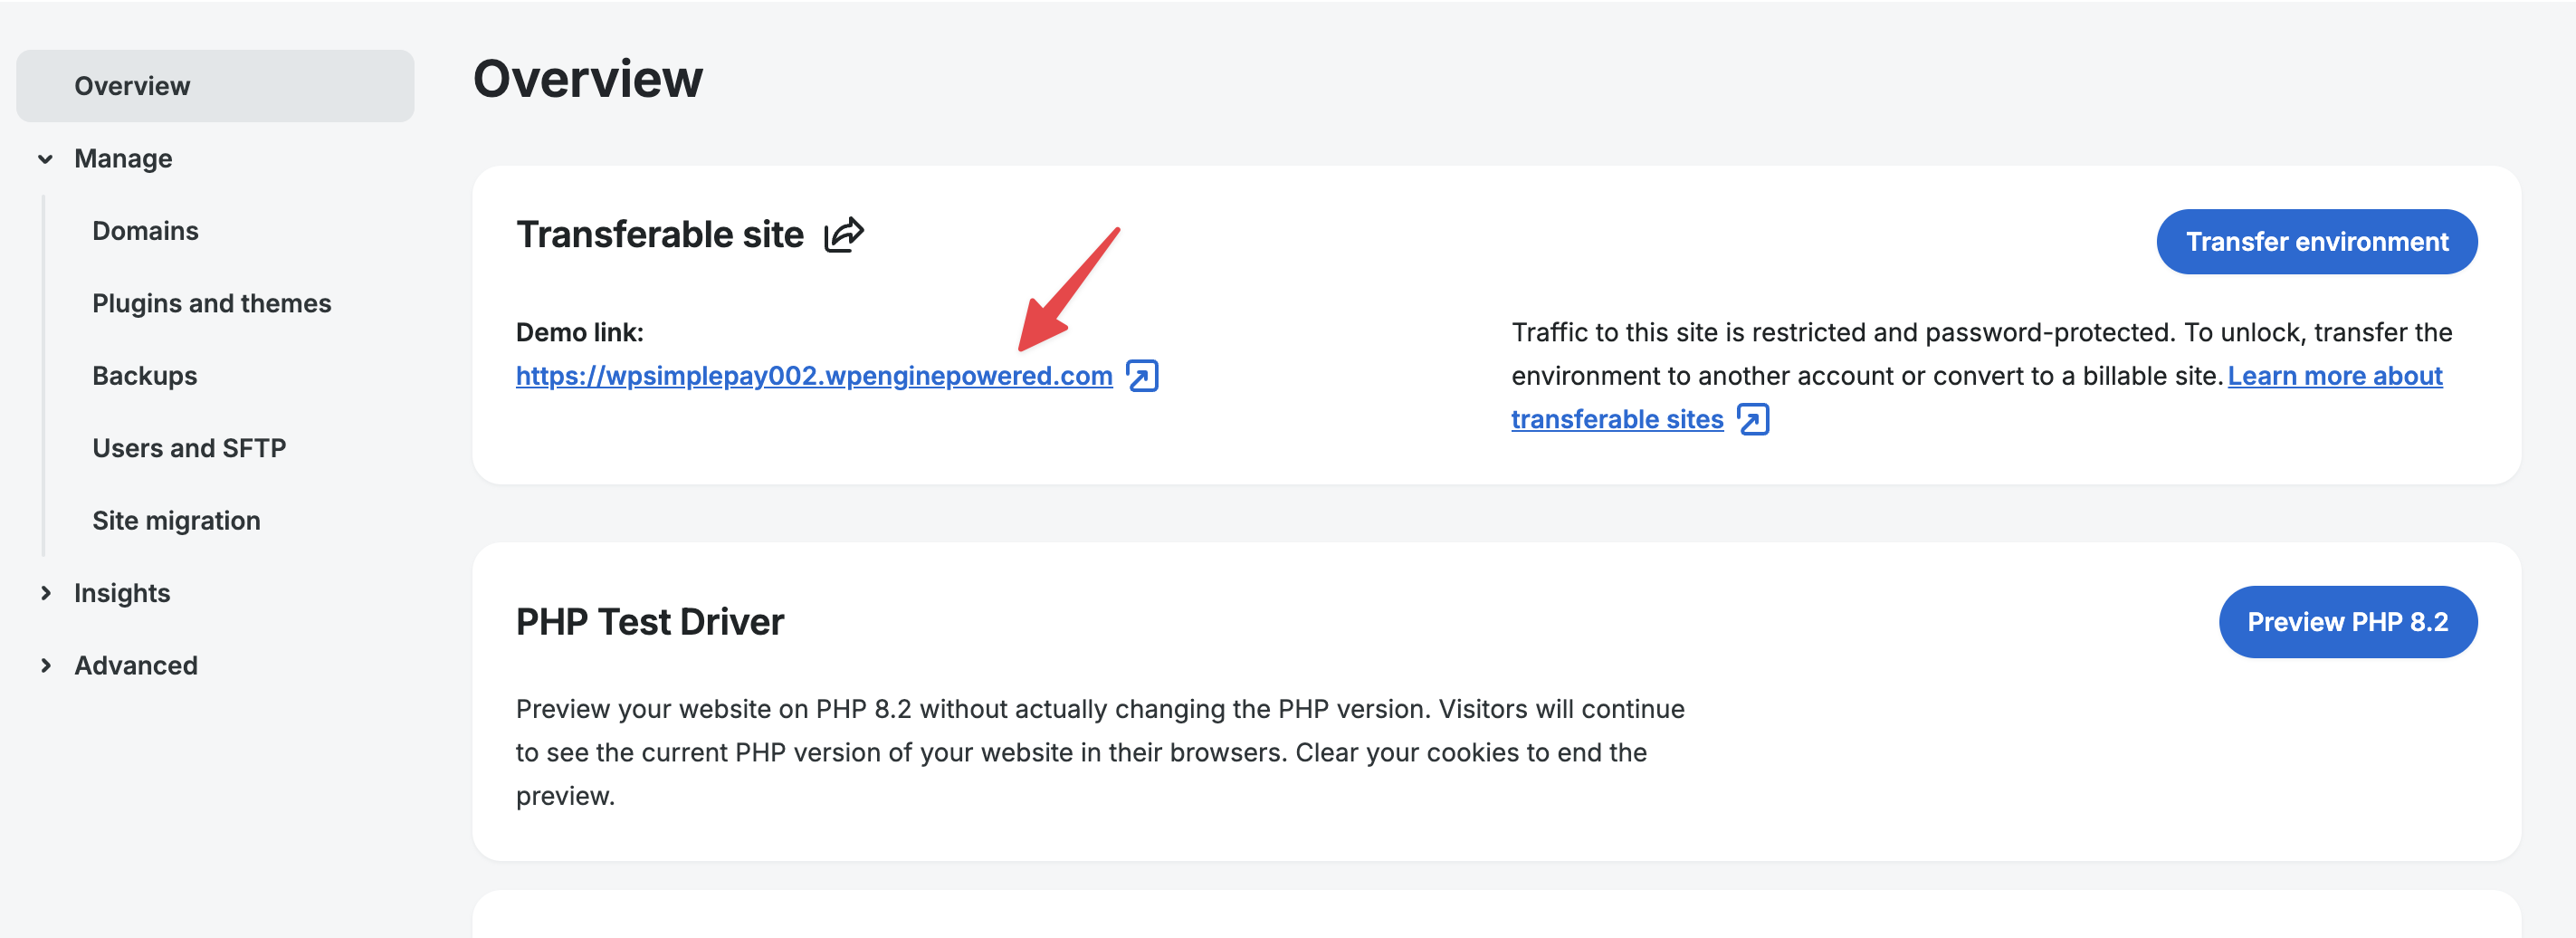
- When you open the site, you should see an .htaccess screen. These credentials are near the middle of the overview page.
- After returning to your installations overview page in WP Engine, click on Site Migration in the left sidebar.
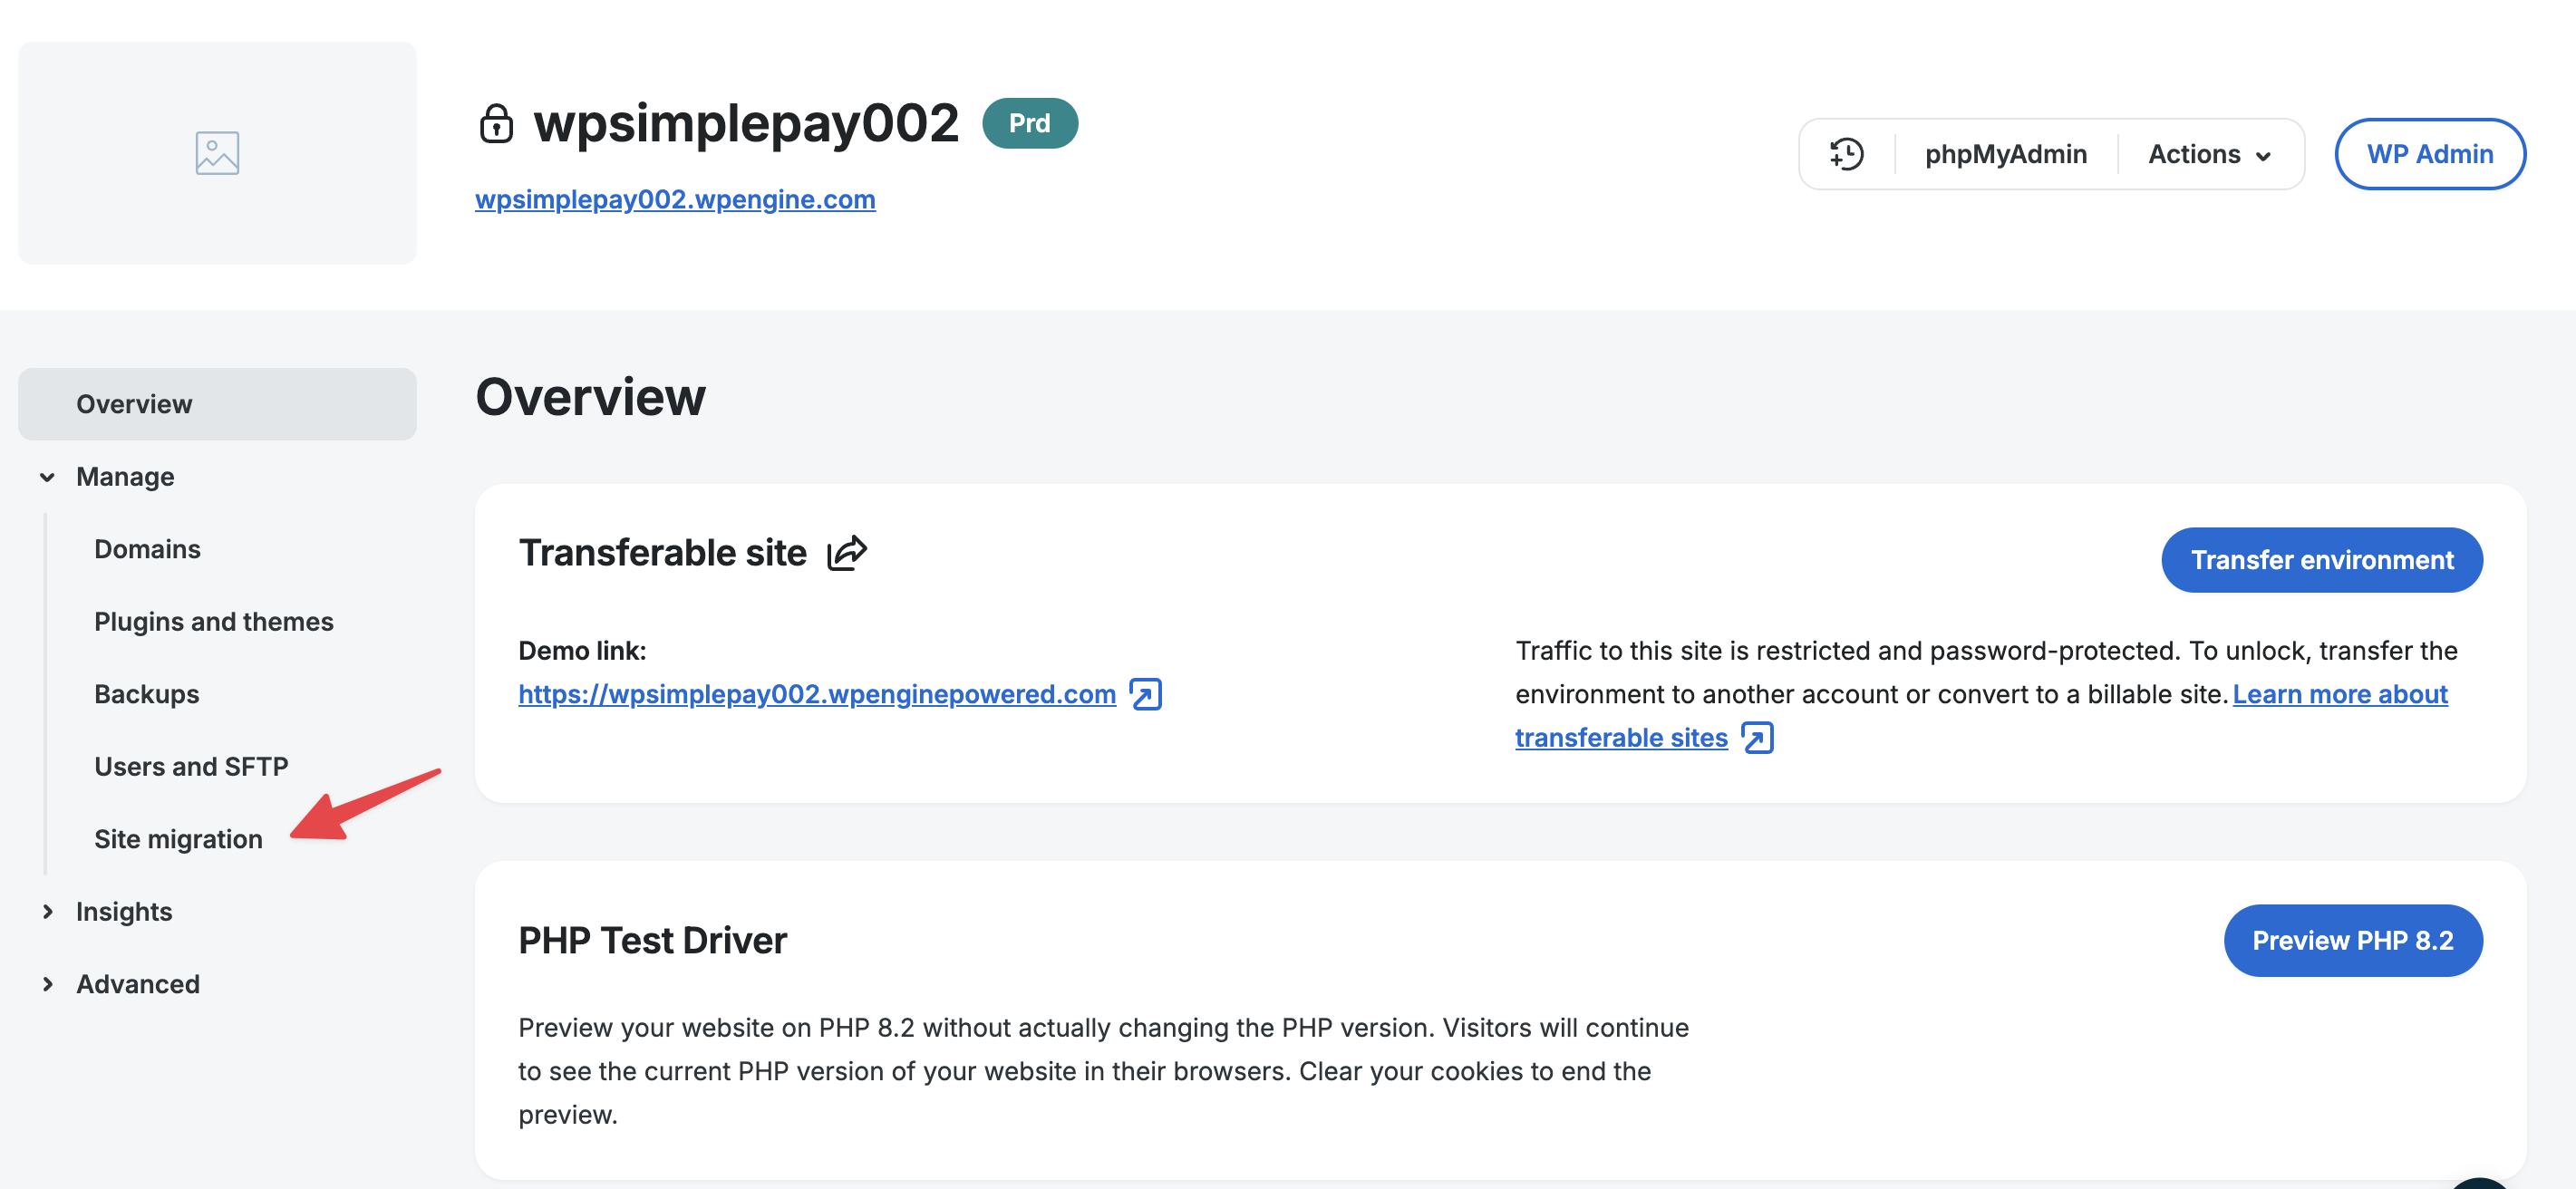
- Scroll down and go to the Connection Info section to copy the information. You will need this when you install the plugin on the customer’s site. You should also download the Site Migration plugin to install on the customer’s site.

- On the customer’s site, go to Plugins > Add New.
- Install the Site Migration plugin that you downloaded in the previous step.
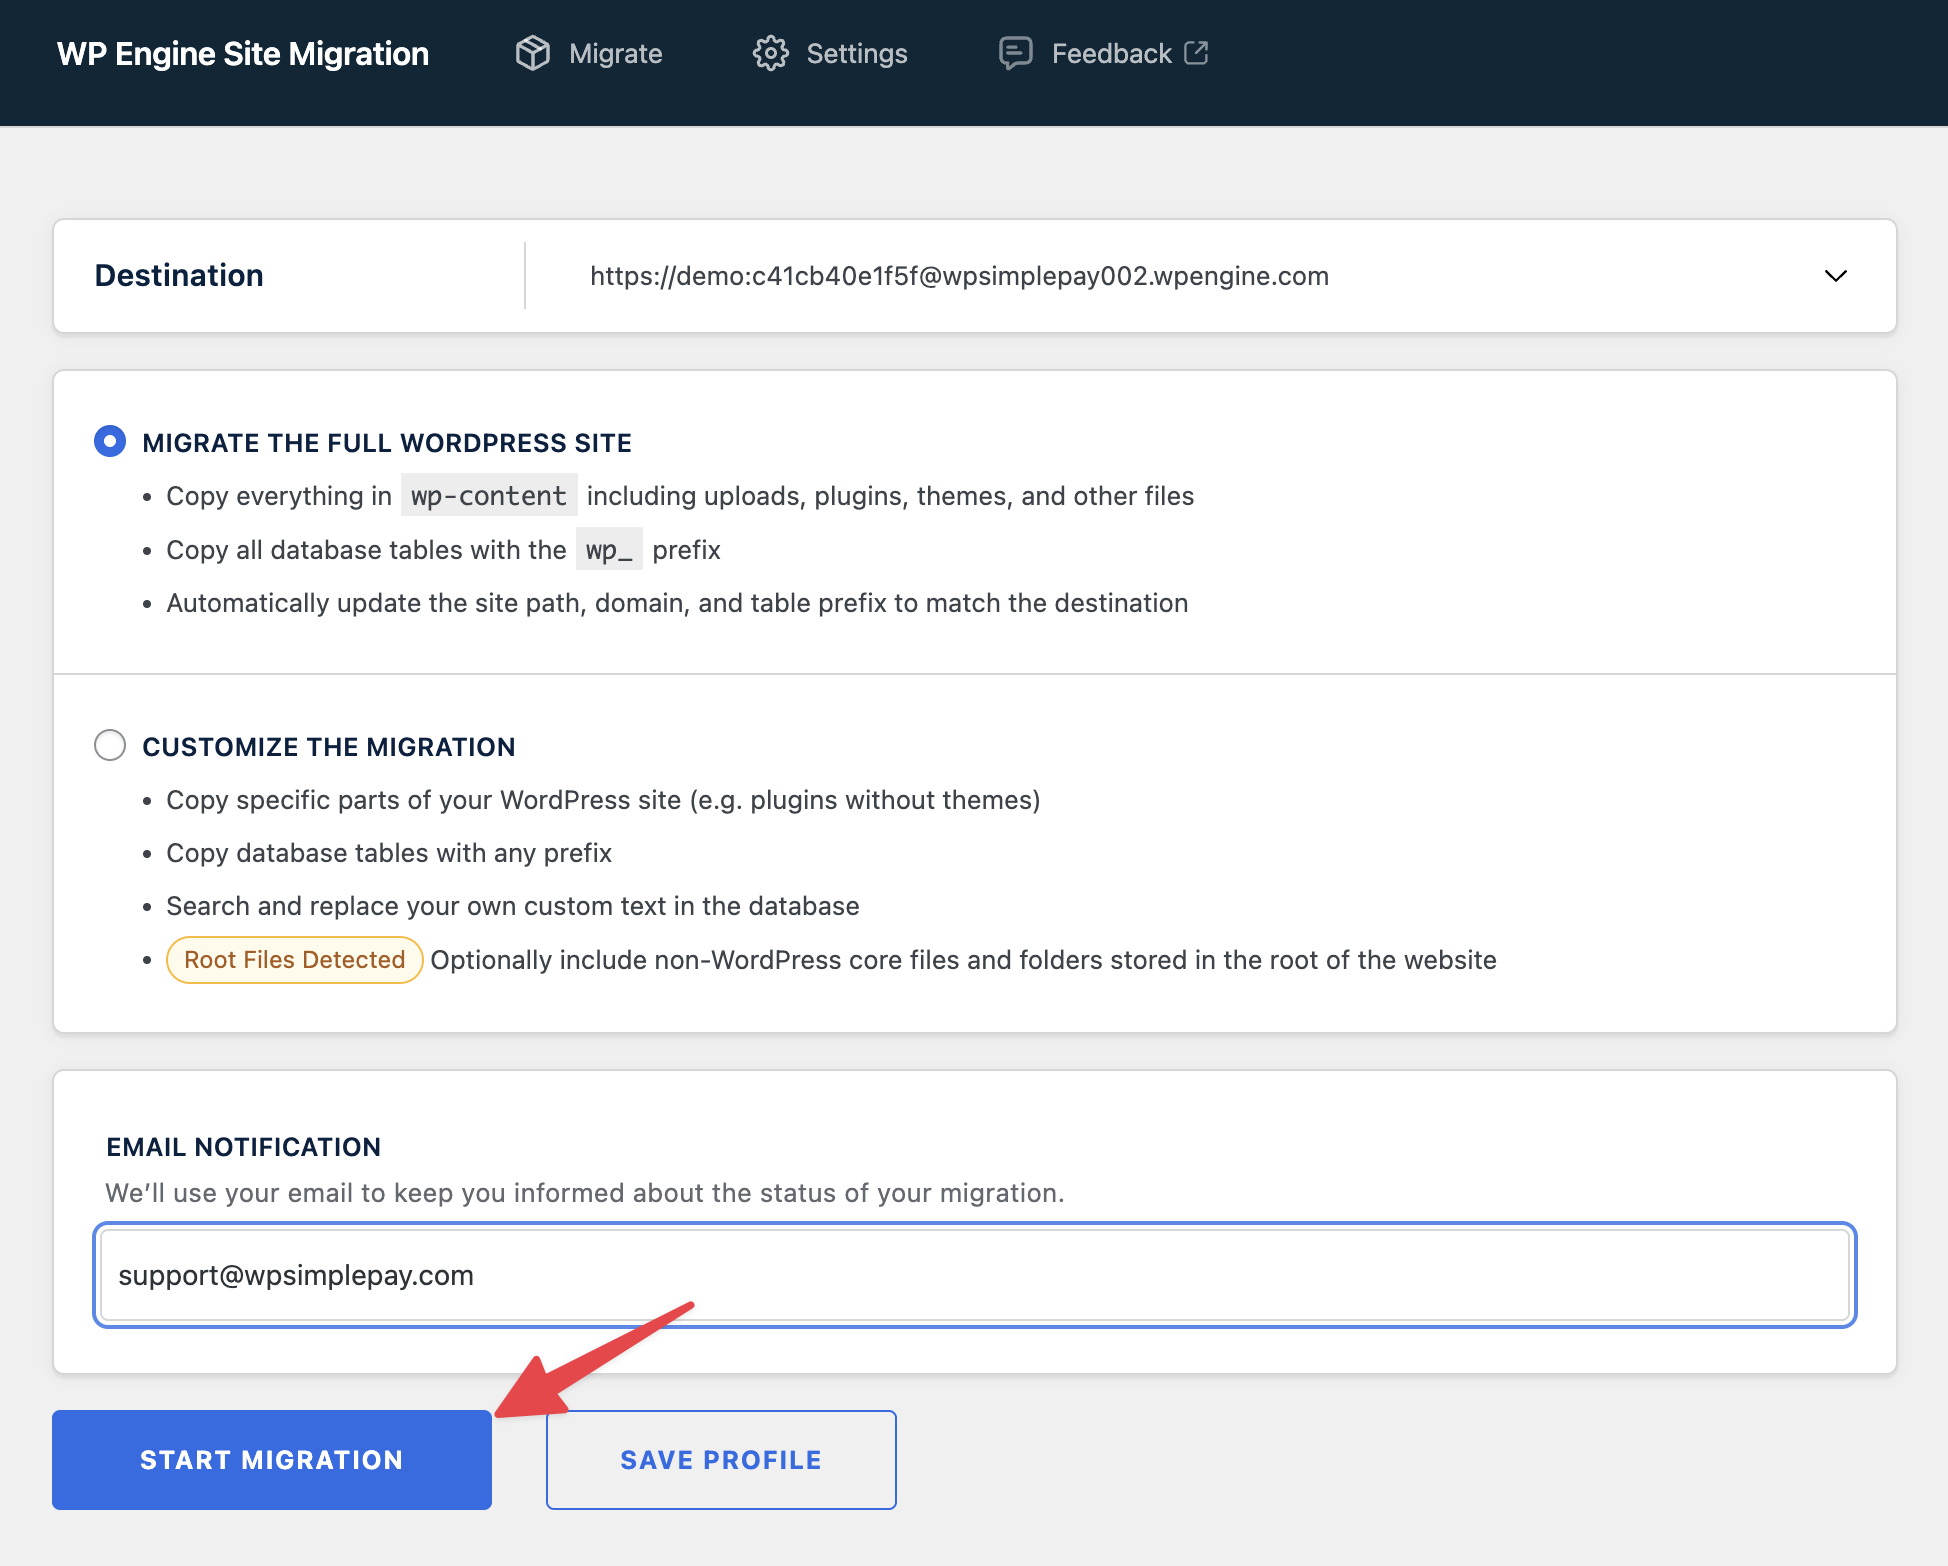
- Open the settings page for this plugin (will be a top-level item in the left menu called Site Migration), then fill out the top fields:
- Click the Start a New Migration button
- In the next screen, paste the credentials you copied from WPEngine in a previous step in the provided area, then click Connect. The procedure will continue if the credentials are accepted and no other errors are encountered.
- Click the button at the bottom to start the migration process. The migration will begin.
This will take a while (often 10-20 minutes, but in rare cases, it can take an hour or more). That’s why it’s best to just set that tab/window in the background while you continue with other support tasks.
When the migration has started: Add a note to the HS ticket sharing the URL where the copied site will be located (this will help keep you organized, and help other team members if they jump in to help).
Remove Obsolete Tables (Note: I have never had to do this, but here just in case)
A critical part of the migration process is removing any old or obsolete tables from the database. This will include tables from previous migrations and those from the “clean site” install step. This should be done each time you migrate a new site to WP Engine, as it keeps the environment as accurate to the live version of the site as possible.
To remove obsolete tables, we will use our WPForms WP Engine Staging plugin (click to download).
- Open the newly migrated site, install and activate the plugin via the zip file.
- Navigate to the main Dashboard, and look for the WPEngine Obsolete Tables widget:

- If obsolete tables are found, select Drop Obsolete Tables and OK on the confirmation message.

- When tables are successfully dropped, a message should appear at the top of the Dashboard page confirming the process has completed that begins with “WP Engine obsolete tables removed”:

Once the success message is displayed, all obsolete tables should be successfully removed and you may proceed with troubleshooting.
FAQ
What if everything is working fine on WP Engine but not on the customer’s site?
If the issue on a customer’s site cannot be replicated on WP Engine, it might help to compare the list of plugins on both sites to check if a plugin has not been copied over. This can help narrow down the conflicting plugin.
WP Engine by default does not allow certain plugins to be installed on sites hosted on their server for security and performance reasons. When one of such plugins is installed on the customer’s site, it will not be copied over to WP Engine. For the full list of plugins, see WP Engine’s Disallowed Plugins article.